Ever wanted to drop your own beats without spending a dime? Good news: it’s totally possible to make your own beats for free, even if you’re a complete beginner. In this guide, we’ll walk through a step-by-step process to create music at no cost. We’ll cover everything from choosing the right tools (including free software and AI music generators) to building a simple track and exporting it. By the end, you’ll have the knowledge to start crafting beats in your bedroom studio (a.k.a. your computer or phone) without breaking the bank. Let’s get started!
Step 1: Plan Your Beat – Style, Tempo, and Vibe
Before you touch any software, take a moment to plan out what kind of beat you want to make. Ask yourself a few questions: What genre or style are you aiming for? (Hip-hop, EDM, lo-fi, trap, pop, something else?) Do you hear a certain vibe or mood in your head (chill, aggressive, upbeat, dark)? How fast or slow should it be (tempo measured in BPM – beats per minute)? Having a rough vision will guide your decisions in the next steps. For example, a lo-fi hip-hop beat might be around 80-90 BPM with a relaxed, mellow vibe, whereas a dance beat might be 120-130 BPM and energetic.
You don’t need to know music theory for this – use your intuition and references. It helps to listen to a couple of songs you like that are in the style you want to emulate. This will tune your ear to the drum patterns and instruments commonly used. Jot down a few notes about what you notice (e.g., “trap beat – heavy 808 bass, fast hi-hat rolls, tempo ~140 BPM” or “boom bap hip hop – dusty jazz samples, swingy drums, ~90 BPM”). This little planning phase will make the actual beat-making smoother, because you’ll have a target to shoot for instead of randomly tinkering.
Pro tip: If you’re not sure where to start, default to something simple. For instance, plan to make a basic 4-bar hip-hop loop with drums, a bassline, and one melodic element. You can always get more complex later, but even professional producers build from simple loops.
Step 2: Choose Your Free Beatmaking Tools (DAWs and Apps)
Now that you have an idea of your beat’s style, it’s time to pick the tools to create it. Luckily, there are plenty of free beat-making software options and apps available:
- AI Beat Makers: You can also enlist some AI help (which is often free or has free trials). For example, SOUNDRAW lets you generate customized music by selecting mood/genre, and you can do unlimited drafts without paying (you only pay if you want to download the final track). Using an AI tool like this can be great for inspiration – it might create a beat outline that you can import into your DAW and tweak. Another AI tool, Boomy, allows free users to create and save a limited number of AI-generated songs. If you’re really stuck for ideas, try having an AI generate a baseline beat, then add your own flavor to it.
- Online/Web-Based DAWs: If you don’t want to install software, try a free online digital audio workstation (DAW) like BandLab or Soundation. BandLab is a popular cloud-based music studio that runs in your browser and on mobile; it’s 100% free and lets you create projects with multiple tracks, virtual instruments, and effects. (BandLab even has an AI feature called SongStarter that can generate royalty-free music ideas for you to build on.) Soundation is another browser DAW with a free tier that provides loops, virtual instruments, and even real-time collaboration features. These online tools are great because you can get started immediately without worrying about system requirements.
- Free Software DAWs: If you prefer installed software, consider LMMS (Linux Multimedia Studio) or Cakewalk by BandLab (Windows only). LMMS is an open-source workstation that’s like a free alternative to FL Studio – it has a step sequencer for drums, a piano roll for melodies, and supports VST plugins. Cakewalk is a professional-grade DAW that was formerly paid but is now available for free; it’s a bit more complex but very powerful for MIDI and audio recording. Another fun one is MPC Beats by Akai, which is a free beat-making program based on the classic MPC workflow (16 pads for drums, etc.). If you’re on Mac or iOS, don’t forget GarageBand – it comes free with Apple devices and is excellent for beginners, with many built-in loops and drum kits.
- Mobile Apps: Prefer using your phone or tablet? Apps like BandLab (again, on mobile), GroovePad, or FL Studio Mobile (has a free trial) can be handy. They often have tap-friendly interfaces and pre-made loops to get you started quickly on a beat while on the go.
For this step, pick the tool that fits your comfort level. If you like visual interfaces and control, a DAW (BandLab, LMMS, etc.) might be best. If you have no idea how to start a beat from scratch, experimenting with an AI music generator like SOUNDRAW or BandLab’s SongStarter could give you a quick win – you’ll instantly get a beat to work with, which you can modify or use as learning material. The key is that all these options are free, so you can try multiple and see which one you vibe with. Go ahead and set up your chosen platform (sign up for a free account or download the software).
Step 3: Create a Basic Drum Pattern (The Backbone of Your Beat)
Drums are the foundation of most beats, so that’s a logical place to start building your track. In your chosen tool, load up a drum kit – this could be a virtual instrument that emulates a drum machine or a drum sampler where you can tap in patterns. Many free platforms have pre-made drum loops you can drag in as well, but let’s focus on making a simple pattern yourself; it’s more rewarding and helps you learn rhythm.
A classic beginner-friendly drum pattern is the “four-on-the-floor” for dance music (kick drum on every beat: 1-2-3-4, with snares/claps on 2 and 4). For a hip-hop or pop beat, a common pattern is kick on 1 and 3, snare on 2 and 4 (the backbeats). Here’s an example in a 4/4 measure (4 beats per bar):
- Beat 1: Kick
- Beat 2: Snare (and maybe another kick slightly before or after for groove)
- Beat 3: Kick (often a bit off the exact beat for a human feel)
- Beat 4: Snare
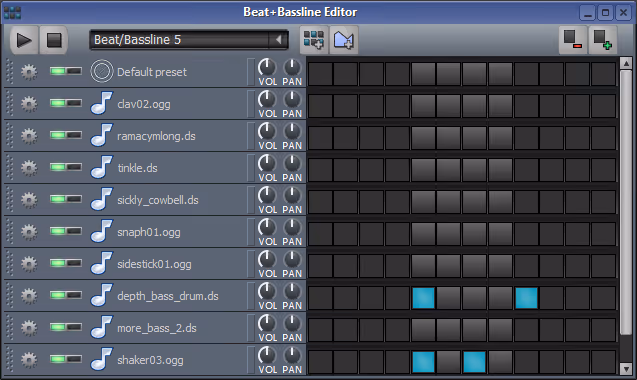
You can program this in a step sequencer or piano roll. Most free beat-making tools have a step sequencer grid – for instance, BandLab’s online Studio has a drum machine interface where you can click squares on a 16-step grid to place hits. Set your tempo (if you planned BPM earlier, use that; you can usually adjust a slider or number for BPM in the project settings).
Now, hit play and listen to the loop. Tweak the timing or add additional drum hits (like hi-hats or percussion) to make it interesting. A simple hat pattern might be 8th-note ticks (placing a hi-hat hit in every gap between the main beats). For more swing or groove, you can shift some hits off the grid if your software allows, or choose a swing percentage.
Don’t worry if this sounds a bit technical – the main point is to get a basic beat going. You’ll likely do some trial and error: add a kick here, listen, move it there, listen again. This experimentation is how you learn. And remember, there’s no right/wrong – if it sounds good to you, it’s good! Keep the pattern short and looping (1 to 2 bars) for now. You can always extend it later.
Tip: Use available resources. Many free DAWs come with demo projects or pattern presets. You can load a preset beat and see how the drums are placed, then alter it. Also, YouTube tutorials are a goldmine (“how to program X genre drums in BandLab/LMMS/etc.”). If you followed Step 1 and have a reference track, try to imitate that drum pattern by ear.
Step 4: Add a Bassline to Groove
With drums in place, the next layer is usually the bassline. The bass works hand-in-hand with the kick drum to establish the groove and key of your beat. Even if you don’t know music theory, you can create a simple bass pattern by ear. Here’s how to go about it:
Choose a bass instrument in your tool. This could be a synth bass, an electric bass guitar sound, or even a deep 808 bass (common in trap and hip-hop). In BandLab, for instance, you could add a virtual instrument track and select a bass preset. In LMMS or GarageBand, load a bass synth plugin or default bass sound.
Now, record or draw in a bassline. One easy method is to use the root note of the key you think your song might be in. If you don’t know keys, just pick a note that sounds good with your drums. You can literally click around on a piano roll until something catches your ear. When you find a nice low note, try sequencing it rhythmically to complement your drums. Often, bass notes land on or around the kicks to reinforce them. For instance, if your kick hits on beat 1, you might put a bass note there too.
Keep the bassline simple for starters – maybe two or three different notes repeating every bar. Many hit songs have basslines that are super simple and repetitive, so don’t overthink it. Focus on the rhythm: maybe a long note on beat 1, then another on the “and” of 2, etc., creating a call-and-response with the kick/snare. Play the loop and adjust the bass notes higher or lower until they sit well with the drums (avoid clashing or dissonant notes).
If you’re feeling adventurous, you can add variation in the second bar (like a slight change at the end of a 2-bar loop to keep it interesting). But even a one-bar bass loop can work if it’s catchy. Use your ears – do you start nodding your head to the drum and bass combo? That’s a good sign you have a solid groove.
Note: For genres like trap or EDM, you might use an 808 bass which is more of a kick-bass hybrid. These can be one-shot samples you play on different pitches. Most free kits will have at least a couple of bass/808 sounds. Drag them in or play them on a sampler track at different pitches to form a melody. The rule of thumb: less is more with bass when you’re starting out.
Step 5: Layer in Melody or Chords (Use Free Instruments or Loops)
Now it’s time to add a melodic element – something for listeners to hum or a chord progression to give your beat musical richness. Depending on the genre, this could be a simple melody, a synth pad, a piano riff, or even a sample/loop. Since we want to keep this free, let’s explore both doing it yourself and using free melodic loops:
Option A: Play or program a melody. Using a virtual instrument (like a keyboard, guitar, synth, etc.), try to come up with a short melody that fits over your drum and bass loop. It could be as short as one bar that repeats. If you have a MIDI keyboard, you can just jam along until you find something. If not, click notes into the piano roll (most DAWs will let you draw notes with your mouse). Aim for 3-5 notes that sound good together. You might use notes that correspond to your bass (for example, if your bass note is an A, using A and a few other notes that form a chord like C# and E would be in the A major chord). But even without knowing that, trial and error works: find a first note that sounds good (not clashing with the bass), then build a little tune. Many great melodies are stepwise (moving up or down to adjacent notes) and have a rhythmic motif. Start simple – even just two alternating notes can become a cool hook if you give them a nice rhythm.
Option B: Build chords for atmosphere. If melody feels daunting, try adding chords. Some free tools have a chord helper or you can use one-finger chords in apps like Soundation. Chords are multiple notes played together. A very common progression for pop/hip-hop is something like I – VI – IV – V (in Roman numeral terms) but again, if you don’t know theory, use a cheat: there are websites and in-app tools that let you choose a key and then just pick preset chord buttons. For instance, BandLab’s instruments include preset chord options – you select a scale and it highlights notes that fit. Strum or hold chords under your beat to see what clicks.
Option C: Use free loops or samples. If creating a melody from scratch is frustrating, leverage the many free loops available. Websites like Freesound, Looperman, or even BandLab’s built-in library offer melody loops or instrument riffs that are royalty-free. You can search for terms like “free guitar loop 90BPM A minor” or just browse by genre. Once you find something, drag the loop onto a track in your project. Make sure the loop’s BPM is close to yours (or use the DAW’s time-stretch to fit it). A well-chosen loop can instantly elevate your beat – just be sure the loop is labeled as free or royalty-free for use. Many content creators and producers share loops under Creative Commons licenses, meaning you can use them as long as you credit the creator, for example (we’ll talk more about licensing in the next article, but for now, stick to obviously free sources).
Whichever method you choose, after adding this melodic or harmonic layer, listen to your loop as a whole. Now you’ve got drums, bass, and a melody/chords – that’s essentially a complete beat loop! If something sounds off (maybe a melody note clashes with the bass), adjust the note or try a different one. Use your gut feeling; if it sounds pleasant or exciting, you’re on the right track.

Step 6: Spice It Up – Percussion, FX, and Variation
At this point, you have a basic 4 or 8-bar loop that forms the core of your beat. Great work! To keep things interesting, especially if you want your beat to last a couple of minutes, you should add some variations and ear candy. Here are some ideas, all doable with free resources:
- Extra Percussion: Add another drum element like a shaker, tambourine, or second hi-hat pattern to give the rhythm more depth. These can be very low in the mix but help the groove. Many drum kits include these sounds. For example, you could have a shaker doing 16th notes lightly in the background, or add a crash cymbal at the start of every 8-bar section.
- FX and Transitions: Look for free sound effects like a riser, a crash, or a reverse cymbal to signal transitions (e.g., before a drop or chorus). Freesound.org has tons of user-contributed samples – you might find a swell or whoosh that’s nice. Dropping an FX at the end of a 4-bar loop can create a sense of one section leading to another.
- Automation & Filters: Even free tools often allow you to automate volume or apply a filter. A classic move in EDM/hip-hop is to low-pass filter the beat (make it muffled) in an intro or breakdown, then release it. You can simulate a DJ-style filter sweep if your DAW has an EQ or filter effect – automate the cutoff frequency to go from low to high before your beat “kicks in” fully.
- Breaks and Drops: To add variation, consider removing elements at certain points. For instance, drop out the drums for one bar to create a brief pause, then slam everything back in (this creates impact). Or mute the bass in the intro and only bring it after 8 bars. These kinds of arrangement tricks keep the listener engaged. In a typical arrangement, you might structure it like: 8-bar intro (no drums, just melody/chords), then 8 bars of the full beat loop (drums+bass+melody) for a verse, then maybe add another element or a variation for the next 8 bars (could be a new counter-melody or a higher octave of the chords) for a chorus.
- Using AI for ideas: If you feel something’s missing, you could even ask an AI music tool for help on a specific element. For example, use SOUNDRAW to generate a quick drum fill or a chord progression, then mimic it in your project. Some tools like BandLab’s SongStarter might generate a whole beat – you can listen to what it does differently from yours and learn or even directly sample from it since they’re royalty-free compositions.
Remember, even small changes can freshen up a repetitive loop. The goal isn’t to complicate the beat unnecessarily, but to prevent it from feeling too static over time. Professional producers use these techniques of adding/taking away layers to create dynamics in the music. As you experiment, you’ll develop a sense of when to introduce or mute a certain track for maximum impact.
Step 7: Finalize Your Beat – Mixing and Exporting
You’re almost there – your beat is composed and arranged. The final steps are to mix it properly and export the final track.
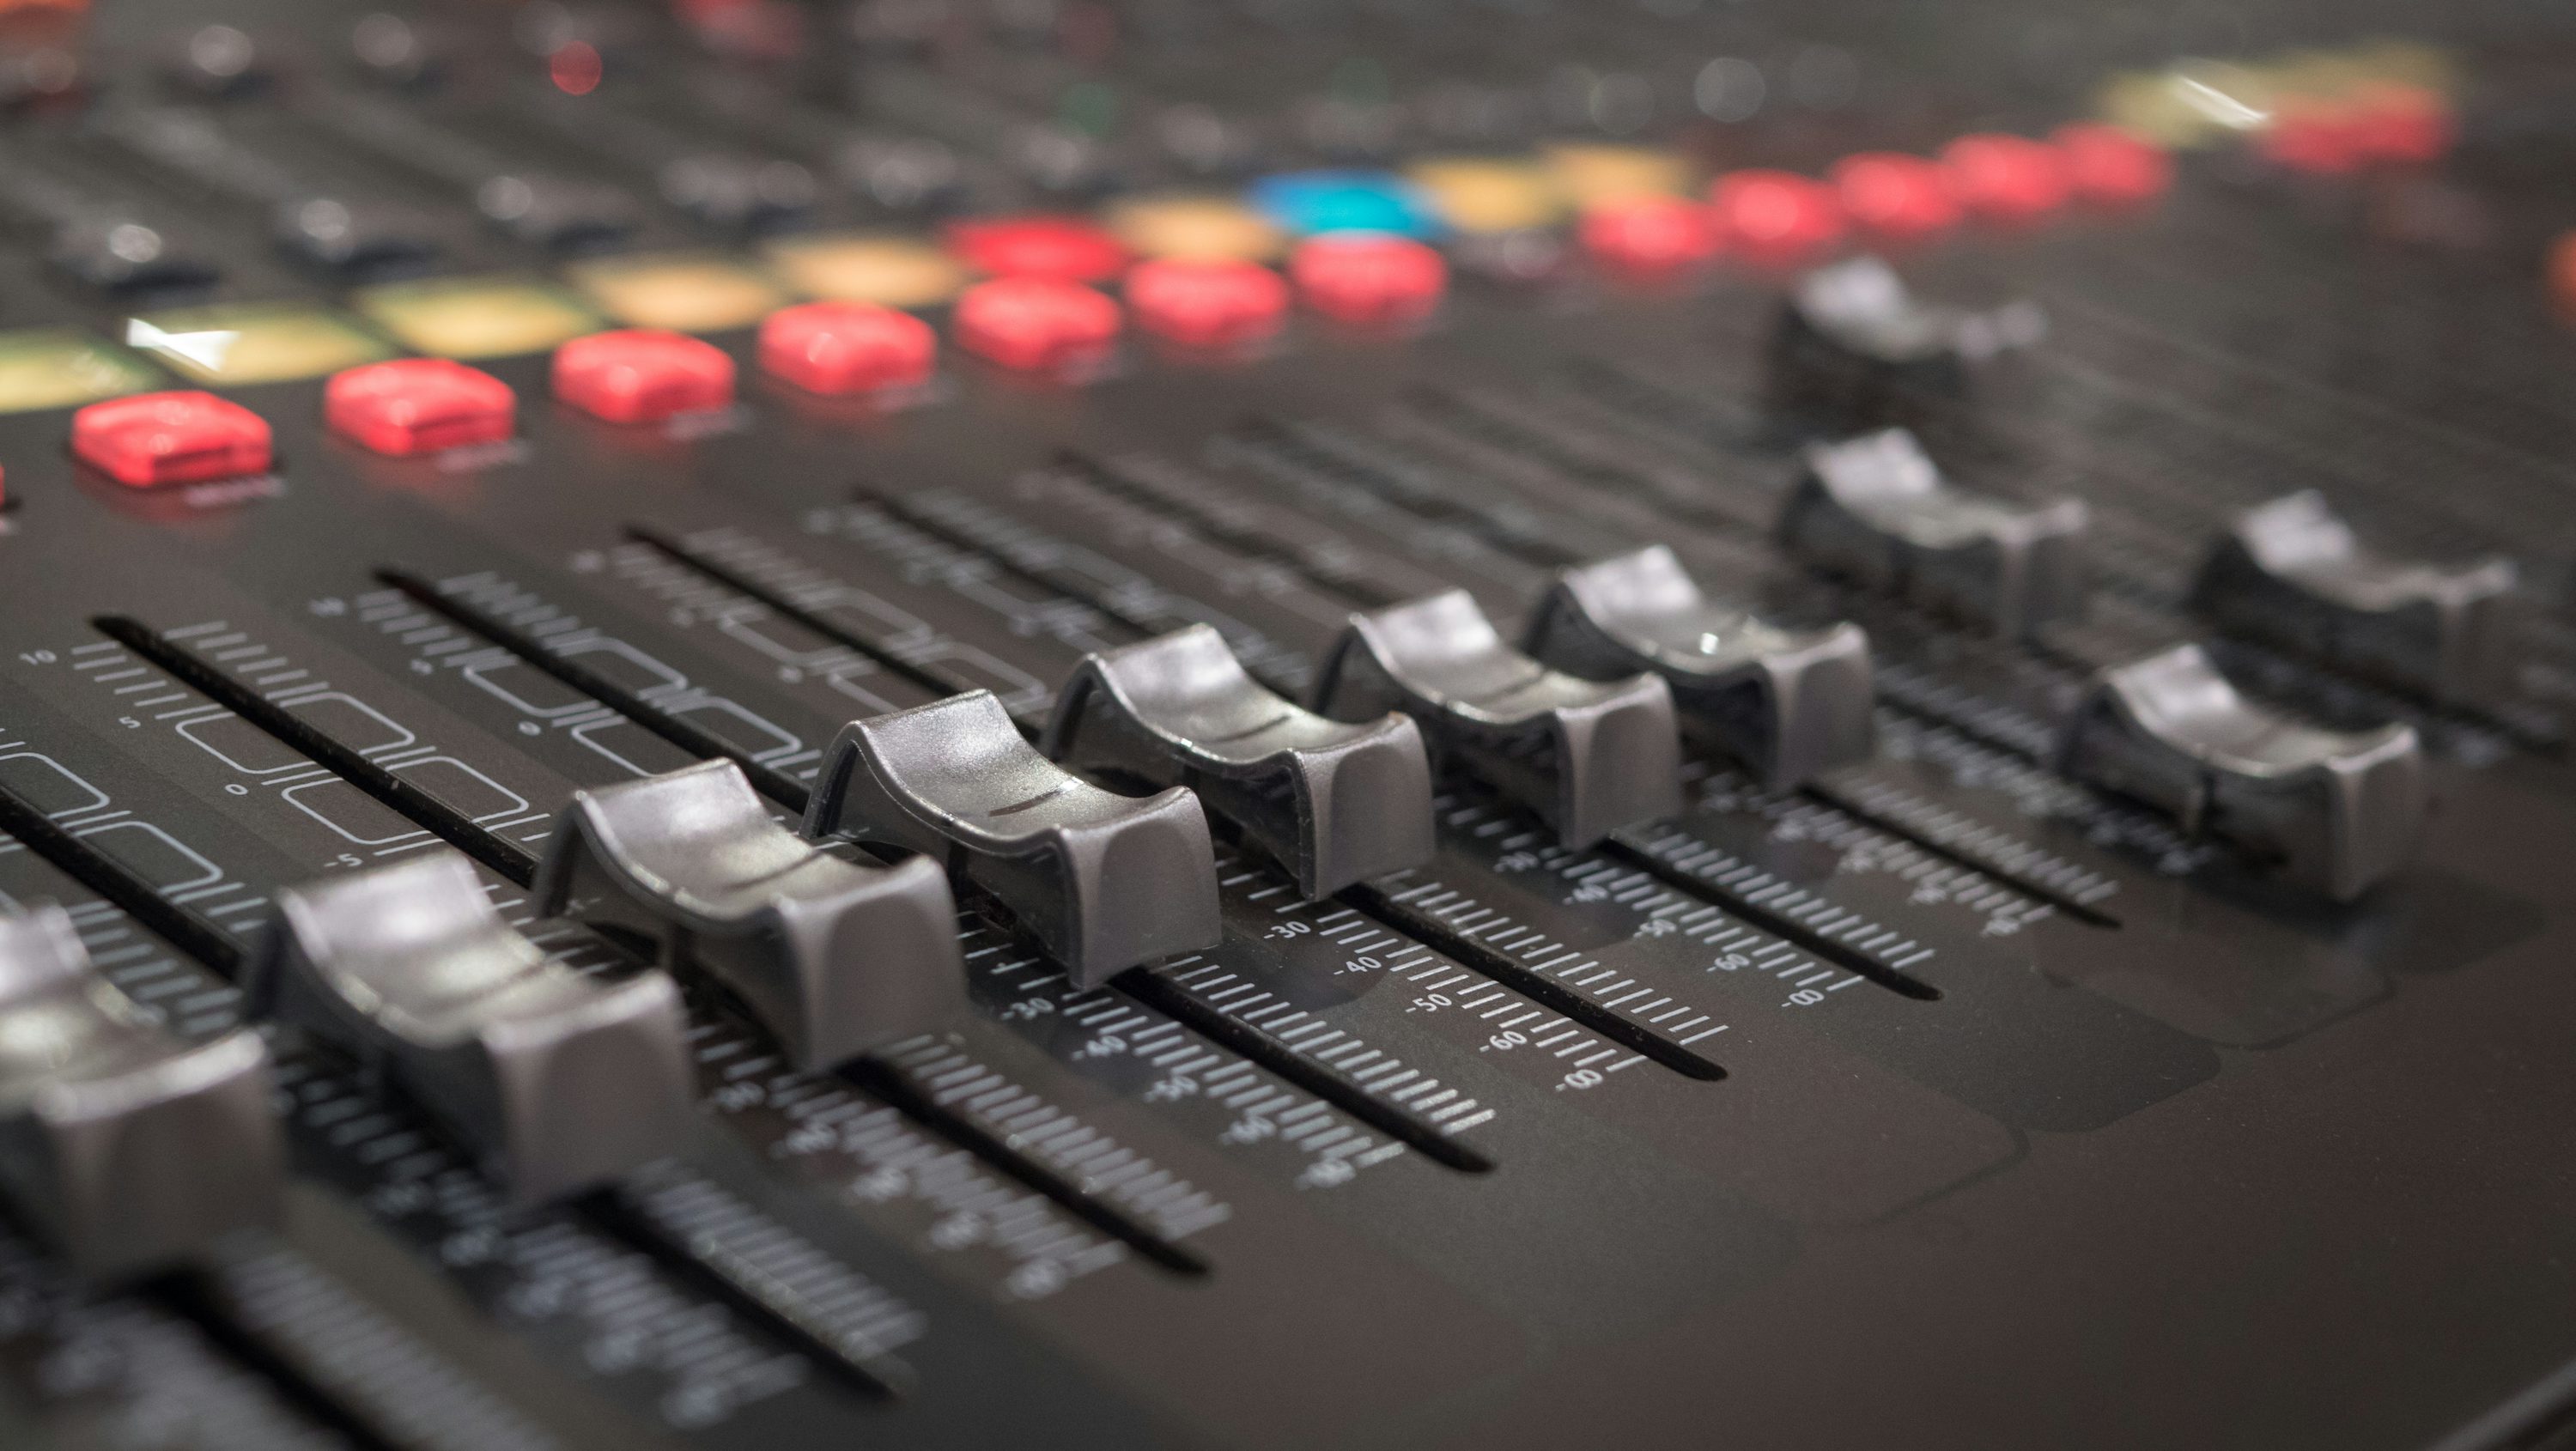
Mixing Basics (on a budget): Mixing is the process of balancing all the elements so they sound clear and punchy together. Even without fancy plugins, you can do a basic mix with the tools provided in free DAWs:
- Volume Levels: Adjust the volume faders of each track. Typically, you want the drums (especially kick and snare) to hit strong. The bass should be prominent but not overpower the kick (they often share low frequencies). Melodies and chords can sit a bit quieter if they’re backing elements, or louder if they are the main hook. There’s no strict rule – use your ears to find a balance where nothing is completely drowning out something else. A trick: lower all faders to zero, then bring them up one by one (start with drums, then bass, then others) until each element is audible and the mix feels balanced.
- Panning: This means moving sounds left or right in the stereo field. Many free tools let you pan tracks. You might pan the hi-hats a little to the right, a guitar riff to the left, etc., to create space so everything isn’t mono-center. Just don’t overdo it – subtlety is key (e.g., pan by 10-20% left/right).
- EQ (Equalization): If your software has an EQ per track (BandLab and Cakewalk do; LMMS might via plugins), use it to carve space. For instance, roll off the very low end (sub-bass frequencies) of non-bass instruments so they don’t muddy the bass. If the melody is clashing with vocals (if you had vocals), you’d adjust, but since this is an instrumental beat, focus on making sure the bass and kick have their own space (sometimes cutting a bit around ~200 Hz on one of them can reduce muddiness). EQ can get complex, but at a basic level: reduce boomy or harsh frequencies and ensure clarity.
- Built-in Presets: Many beginner-friendly platforms have preset “mastering” or effects. BandLab has a library of effect presets (like “Clean Up Master” or “Bass Boost”) which you can drag onto the Master channel or individual tracks. Feel free to try those – they might instantly enhance your mix without much knowledge needed.
The mixing stage might seem subtle, but it can make your beat sound more polished and loud. If you find this part tricky, don’t stress too much; as a beginner, the key is that you can hear each part and nothing is painfully loud or clipping (distorting).
Exporting: Once you’re happy with the mix, it’s time to export (also called bounce or render) your beat to a file. In your DAW, look for an “Export” or “Download” option. You’ll usually choose a format: WAV for high quality or MP3 for smaller file size. WAV is lossless and better if you plan to do further mixing or share with someone who might rap over it; MP3 is fine for just listening or quick sharing. Select the portion of the timeline you want to export (e.g., the whole song length). Hit export and give the software some time to generate your audio file.
Boom – you now have your own beat saved on your device! The feeling of listening to a track you made yourself is awesome, especially knowing you didn’t spend any money on it. And don’t forget to name your beat – something fun or the vibe it gives you.
Step 8: Use and Share Your Beat
What good is a beat if it just sits on your hard drive? Here are a few ways to make the most of your newly created track:
- Listen and Improve: Play it on different speakers or headphones and see how it sounds. You might catch things to tweak (maybe the bass is too low on your phone’s speaker – a common occurrence). Learning to identify these will help in your next project.
- Show it to friends or online communities: Share your beat with a buddy who’s also into music or post it on a forum/Reddit for feedback. The r/WeAreTheMusicMakers or r/Beatmakers communities often have feedback threads where you can post a link. Be open to tips; you’ll grow faster with constructive criticism.
- Collaborate: If you know any rappers or singers, offer your beat to them to write something. It’s a win-win: they get free music to practice on, you get the experience of your beat turning into a full song. Just clarify the terms – since you made the beat, you hold the copyright initially (we’ll cover copyright more soon), but you can simply give them permission to use it. If you’re both just doing it for fun/not profit, it’s usually straightforward.
- Publishing for free: You could upload your beat to platforms like SoundCloud or YouTube. There’s a huge community of people who share “free beats” on YouTube for others to freestyle to (just be sure to mark whether you allow people to use it or need credit). If you do upload, consider labeling it with style tags (e.g., “Free Chill Lo-Fi Beat – [Title]”) so that interested listeners can find it. Make sure to mention it’s original and copyright-safe in the description if you want to attract content creators to use it.
- Leverage AI tools for promotion: Fun idea – you can use AI to generate a visualizer or simple video for your beat (some free video tools might sync visuals to music). Or use an AI voice to tag your beat (producers sometimes have a tag like “you are now listening to…” synthesized voice).
Since the process described was entirely free and used royalty-free components, the beat is yours to do anything with. You won’t owe royalties or licenses to anyone (assuming you didn’t use a loop that requires credit – if you did use a Creative Commons sample, just follow the attribution requirement by crediting the original creator in your description).
Finally, celebrate the fact that you made music without spending money. The barrier to entry in music production has never been lower. With practice, you’ll get better and might invest in more tools, but it’s absolutely possible to start from zero budget and grow your skills. Many famous producers began by tinkering with free software or cheap gear. Now you’ve taken that first step, keep experimenting and, most importantly, have fun with it. Making beats is a creative journey – and now you’re on your way!
